AskOmics is a web software for data integration and query using the Semantic Web technologies. It helps users to convert multiple data sources (CSV/TSV files, GFF and BED annotation) into RDF triples, and perform complex queries using a user-friendly interface.
In this tutorial, we will learn the basics of AskOmics by analyses RNA-seq results. The data comes from a differential expression analysis and are provided for you. 4 files will be used in this tutorial:
- Differentially expressed results file: genes in rows, and 4 required columns: identifier (ENTREZID), gene symbol (SYMBOL), log fold change (logFC) and adjusted P values (adj.P.Val)
- Reference genome annotation file in GFF format
- Correspondence file between gene symbol and Ensembl id: TSV of two columns: symbol and the corresponding Ensembl id
- QTL file: QTL in row, with 5 required columns: identifier, chromosome, start, end and name
Throughout the guide, you will find
To complete the tutorial, you will need an AskOmics instance. You can install your own or use this public instance.
Account creation and management
Login or signup into AskOmics
AskOmics is a multi-user platform. To use it, you will need an account on the instance. Use the
Hands-on
Create your AskOmics account (or login with your existing one)
Once your are logged, you can use all the functionalities of AskOmics.
Manage your account
To manage your account, use the
Uses the forms to change your personal information.
Data integration
AskOmics convert project specific data into RDF triples automatically. It can convert CSV/TSV, GFF and BED files.
Hands-on
Download the files for the tutorial using the following links:
- Differentially expressed results file
- Reference genome annotation file
- Correspondence file between gene symbol and Ensembl id
- QTL file
Data upload
The first step is to upload the input files into AskOmics. Go on the Files page by clicking on
You can upload files from your computer, or distant files using an URL.
Hands-on
Upload the files limma-voom_luminalpregnant-luminallactate, Mus_musculus.GRCm38.98.subset.gff3, symbol-ensembl.tsv and MGIBatchReport_Qtl_Subset.txt from your computer into AskOmics
Tip
You can also copy files URL and use the
Uploaded files are displayed into the files table. Filenames can be change by clicking on it.

Next step is to convert this files into RDF triples. This step is called Integration. Integration will produce a RDF description of your data: the Abstraction.
Hands-on
Select the four files and click on
Integration
The integration convert input files into RDF triples, and load them into an RDF triplestore. AskOmics can convert CSV/TSV, GFF3 and BED files. During the step of integration, AskOmics show a preview of each files. We can choose how the file will be integrated at this step.
GFF
GFF files contain genetic coordinate of entities. Each entities contained in the GFF file are displayed on the preview page. We can Select the entities that will be integrated.
Hands-on
- Search for
Mus_musculus.GRCm38.98.subset.gff3 (preview) - Select
geneandmRNA Integrate (Private dataset)

CSV/TSV
The TSV preview show an HTML table representing the TSV file. During integration, AskOmics will convert the file using the header.
The first column of a TSV file will be the entity name. Other columns of the file will be attributes of the entity. Labels of the entity and attributes will be set by the header. This labels can be edited by clicking on it.
Entity and attributes can have special types. The types are defined with the select below the header. An entity can be a start entity or an entity. A start entity mean that the entity may be used to start a query.
Attributes can take the following types:
- Numeric: if all the values are numeric
- Text: if all the values are strings
- Category: if there is a limited number of repeated values
If the entity describe a locatable element on a genome:
- Reference: chromosome
- Strand: strand
- Start: start position
- End: end position
A columns can also be a relation between the entity to another. In this case, the header have to be relationName@TargetedEntity and the type Directed or Symmetric relation. a Directed relation is a relation from this entity to the targeted one. A Symetric relation is a relation on both directions.
Hands-on
- Search for
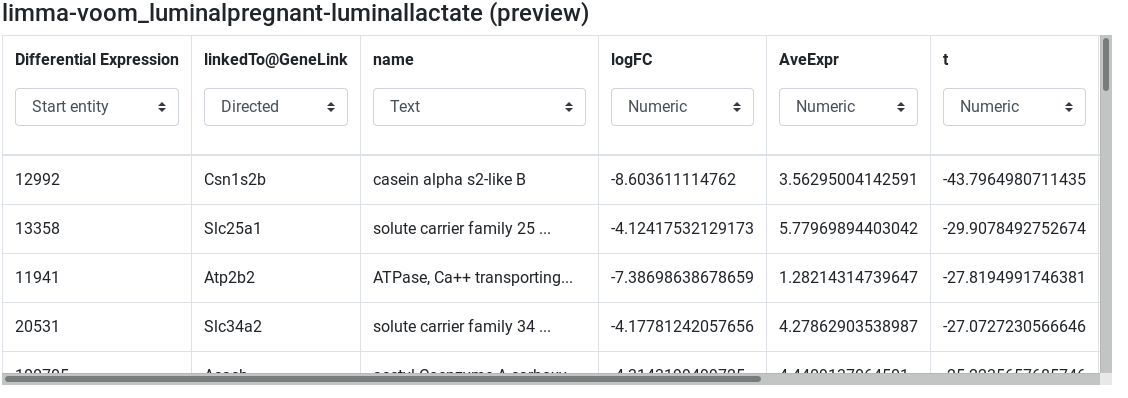
limma-voom_luminalpregnant-luminallactate (preview) - Edit attribute names and types:
- change
ENTREZ IDtoDifferential Expressionand set type to start entity - change
SYMBOLtolinkedTo@GeneLinkand set type to Directed relation - change
GENENAMEtonameand set type to text - Keep the other column names and set their types to numeric
- change
Integrate (Private dataset)
Hands-on
- Search for
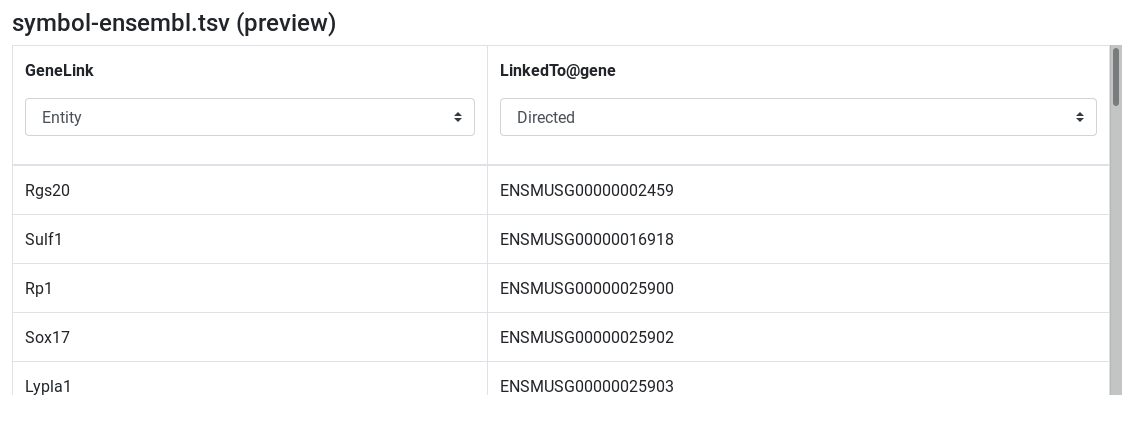
symbol-ensembl.tsv (preview) - Edit attribute names and types:
- change
symboltoGeneLinkand set type to entity - change
ensembltolinkedTo@geneand set type to Directed relation
- change
Integrate (Private dataset)
Hands-on
- Search for
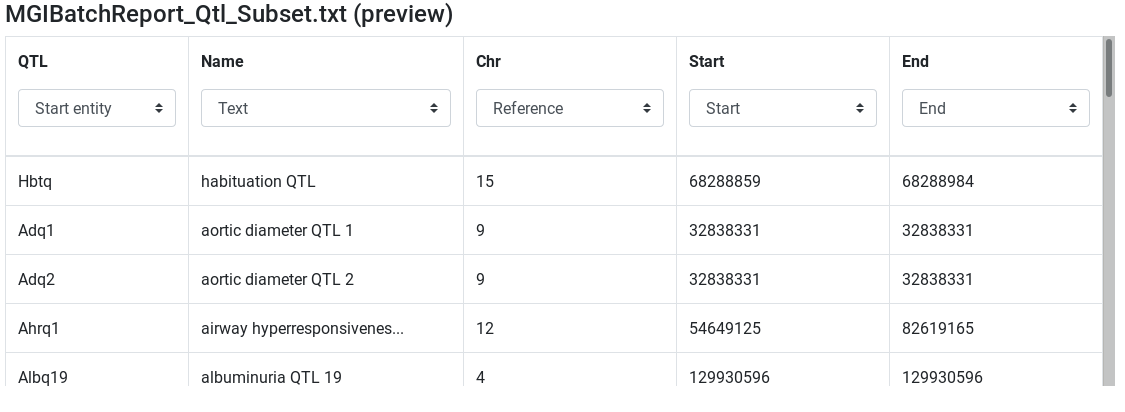
MGIBatchReport_Qtl_Subset.txt (preview) - Edit attribute names and types:
- change
InputtoQTLand set type to start entity - set
Chrtype to Reference - set
Starttype to Start - set
Endtype to End
- change
Integrate (Private dataset)
Manage integrated datasets
Integration can take some times depending on the file size. The
Hands-on
- Go to
Datasets page - Wait for all datasets to be success

The table show all integrated datasets. The status column show if the datasets is fully integrated or in the process of being integrated.
Query
Once all the data of interest is integrated (converted to RDF graphs), its time to query them. Querying RDF data is done by using the SPARQL language. Fortunately, AskOmics provides a user-friendly interface to build SPARQL queries without having to learn the SPARQL language.
Query builder overview
Simple query
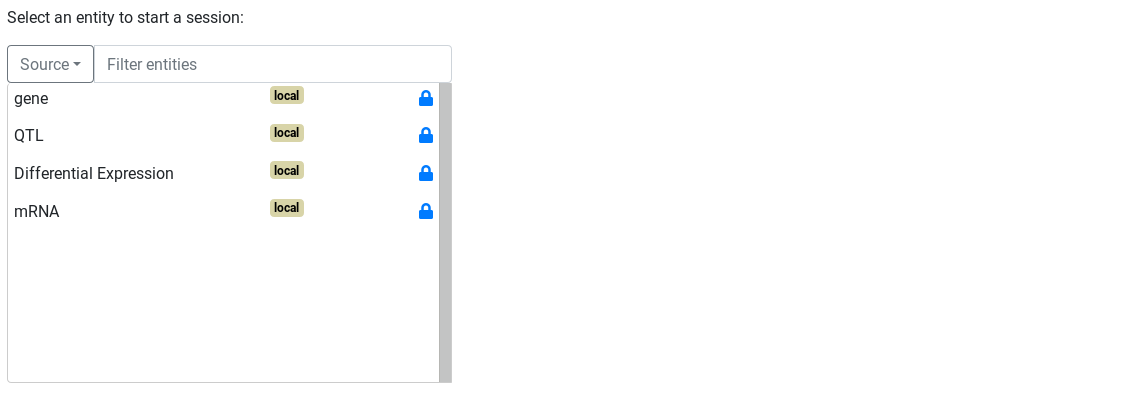
The first step to build a query is to choose a start point for the query.
Hands-on
- Go to
Ask! page - Select the Differential Expression entity
Start!
Once the start entity is chosen, the query builder is displayed.
The query builder is composed of a graph. Nodes represents entities and links represents relations between entities. The selected entity is surrounded by a red circle. links and other entities are dotted and lighter because there are not instantiated.
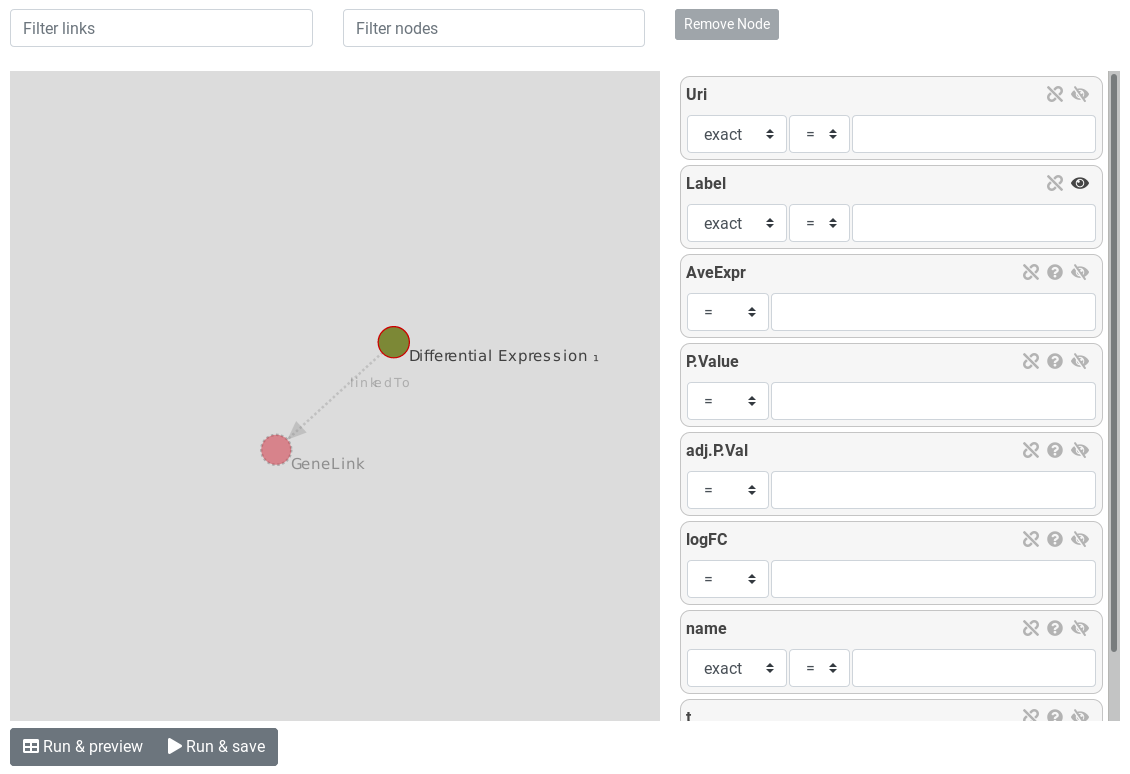
On the right, attributes of the selected entity are displayed as attribute boxes. Each boxes have an eye icon. Open eye mean the attribute will be displayed on the results.
Hands-on
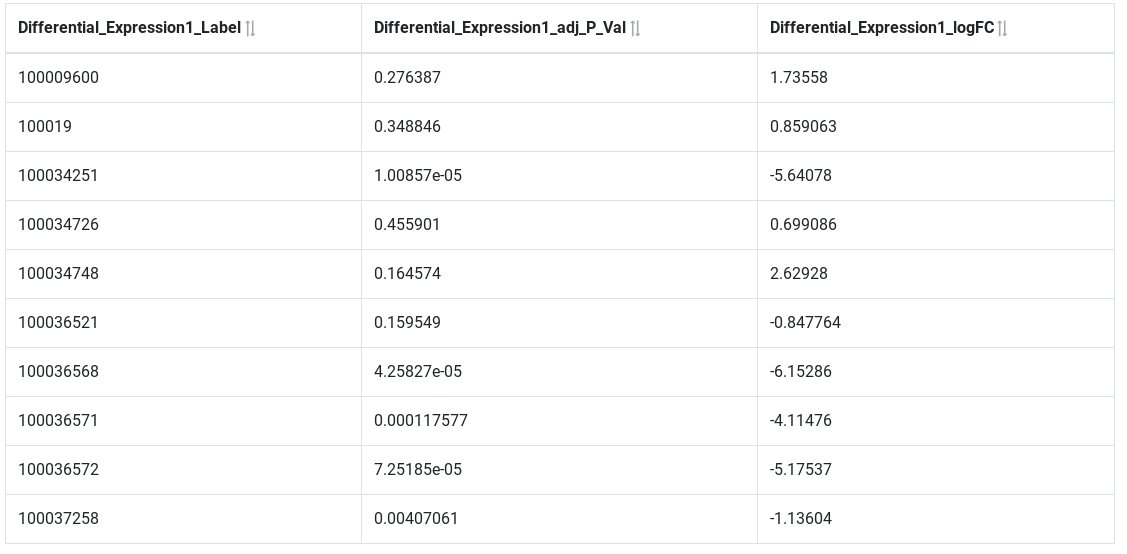
- Display
logFCandadj.P.valby clicking on the eye icon Run & Preview
Filter on attributes
Next query will search for all over-expressed genes. Genes are considered over-expressed if the log fold change is > 2. We are only interested by significant results (Adj P value ≤ 0.05)
Hands-on
- Filter
logFCwith>2 - Filter
adj.P.valwith≤0.05 Run & Preview
Results show only significantly over-expressed genes.
Filter on relations
Now that we have our genes if interest, we will link these genes to the reference genome to get information about location.
To constraint on relation, we have to click on suggested nodes, linked to our entity of interest.
Hands-on
- First, hide
Label,logFCandadj.P.valofDifferential Expression - Instantiate
GeneLink, and hideLabel - Instantiate
gene Run & Preview
Results now show the Ensembl id of our over-expressed genes. We have now access to all the information about the gene entity containing on the GFF file. for example, we can filter on chromosome and display chromosome and strand to get information about gene location.
Hands-on
- Show
referenceandstrandusing the eye icon - Filter
referenceto selectXandYchromosomes (usectrl+clickto multiple selection) Run & Preview
Use FALDO ontology to query on the position of elements on the genome.
The FALDO ontology describe sequence feature positions and regions. AskOmics use FALDO ontology to represent entity positions. GFF are using FALDO, as well as TSV entities with chromosome, strand, start and end.
The FALDO ontology are used in AskOmics to perform special queries between 2 FALDO entities. These queries are:
- Entity included in another entity
- Entity overlapping another one
On the query builder interface, FALDO entities are represented with a green circle and FALDO relations have a green arrow.
Hands-on
- First, remove the reference filter (unselect
XandYusingctrl+click) - Hide
strandandreferenceusing the eye - Instantiate
QTL - Click on the link between
geneandQTLto edit the relation - check that the relation is
geneincluded inQTLon the same referencewithstrictticked Run & Preview
To go further, we can filter on QTL to refine the results.
Hands-on
- got back to the
QTLnode - Show the
Nameattribute using the eye icon - Filter the name with a
regexpwithgrowth Run & Preview
From now, our query is "All Genes that are over-expressed (logFC > 2 and FDR ≤ 0.05) and located on a QTL that are related to growth" This is the results that we are looking for. So we can save it.
Hands-on
Run & save - Go to the
Results page
Results management
The results page store the saved queries. A table show some useful information about the queries. Query name can be edited by clicking on it.
Hands-on
- Click on the name and enter
Over-expressed genes on a growth QTL - press
enterkey

The Action column contain button to perform certain action:
- Preview: show a results preview on the bottom of the table
- Download: Download the results (TSV file)
- Edit: Edit the query with the query builder
- SPARQL: edit the query with a SPARQL editor for advanced users
Hands-on
- Download the results file on your computer using
Download button
Conclusion
In this tutorial we have seen how to use AskOmics Interactive Tool to Build a complex SPARQL query to interrogate 4 different datasets and answer a biological question.